Hairstyle Guide: Trends & Techniques (2024-2025)
Welcome to the ultimate guide for navigating the exciting world of 2024-2025 hairstyles! This comprehensive resource explores the freshest cuts, colors, and styling techniques,
drawing inspiration from runways and everyday looks. Prepare to discover versatile bobs, layered styles, and bold shades like oxblood red, alongside embracing natural textures and sustainable practices.
From retro-inspired cuts like 90s blowouts to the effortlessly chic grown-out shag, and the timeless French girl bob, there’s a trend for everyone. Dare to explore asymmetry, unique shapes, and radiant golden tones.
This guide will empower you to refresh your look and stay ahead of the curve, offering insights into maintaining hair health and finding the perfect style for your face shape.

The landscape of hair fashion is currently experiencing a dynamic shift, moving beyond the singular dominance of previous year’s trends like the butterfly bob and cowboy copper. As we progress through 2024 and look towards 2025, a multitude of styles are vying for attention, offering a diverse range of options for self-expression. This period marks a reinvention of classic cuts, notably the bob and fringe styles, alongside the emergence of entirely new aesthetics.
A key characteristic of these emerging trends is versatility. Styles are designed to be adaptable, catering to various hair textures and lengths. We’re seeing a move towards effortless chic, with looks that prioritize ease of maintenance and natural movement. This is reflected in the popularity of air-drying techniques and styles that celebrate individual texture.
Color trends are equally diverse, ranging from bold statements like oxblood red to more subtle, sophisticated shades like cool-toned brunettes and sandy blondes. Golden tones continue to hold appeal, offering a radiant and universally flattering option. Sustainability is also becoming a crucial consideration, influencing both product choices and styling practices. Ultimately, the current trends emphasize individuality, health, and a relaxed approach to beauty.
The Reign of the Bob: Variations for 2024-2025
The bob continues its reign as a dominant force in hairstyle trends, evolving beyond a single silhouette into a spectrum of variations for 2024-2025. From luxe, sophisticated cuts to more relaxed and textured styles, the bob offers unparalleled versatility. The “French girl bob,” a timeless classic, remains a popular choice, embodying effortless chic with its slightly undone texture and face-framing layers.
However, the bob isn’t limited to a single aesthetic. We’re seeing a rise in choppy bobs, inspired by 90s trends, offering a more edgy and playful look. Slicked-back bobs, often styled into sleek buns or ponytails, provide a polished and modern alternative. Layered bobs add dimension and movement, suitable for various hair types and textures.
The key to a successful bob in 2024-2025 lies in personalization. Consider your face shape and hair texture when choosing a length and layering technique. Whether you prefer a classic, blunt cut or a more textured, layered style, the bob remains a powerful and adaptable choice.
Layered Styles: Adding Dimension and Movement
Layered hairstyles are experiencing a significant resurgence, offering a dynamic and versatile approach to hair design for 2024-2025. Moving beyond simple trims, layering is now employed to create texture, volume, and a sense of effortless movement. This technique works beautifully with various hair lengths, from short bobs to long, flowing locks, adapting to individual preferences and hair types.
The beauty of layered styles lies in their ability to enhance natural texture. Whether you have wavy, curly, or straight hair, layers can amplify your hair’s inherent characteristics. Long layers create a cascading effect, while shorter layers add volume and bounce. Combined with the grown-out shag, layering delivers an edgy, yet manageable, aesthetic;
Strategic layering can also address specific hair concerns. It can remove weight from thick hair, preventing it from appearing bulky, or add fullness to fine hair, creating the illusion of greater density. Ultimately, layered styles provide a customizable and flattering option for anyone seeking to add dimension and vitality to their hair.
Bold Hair Colors: Oxblood Red & Cool-Toned Brunettes
Prepare for a dramatic shift in color palettes for 2024-2025, as bold and sophisticated shades take center stage. Two standout trends are captivating the fashion world: rich oxblood red and cool-toned brunettes. These colors offer a striking departure from the warmer tones that previously dominated the scene, embracing a more edgy and refined aesthetic.
Oxblood red is a deep, wine-inspired hue that exudes confidence and glamour. It’s a statement color that works exceptionally well on various skin tones, adding depth and intensity to any hairstyle. Cool-toned brunettes, on the other hand, provide a more subtle yet equally impactful change. These shades, ranging from ash brown to dark chocolate, offer a sophisticated and modern look.
The key to achieving these colors successfully lies in professional application. Ensuring the correct undertones and achieving even saturation are crucial for a flawless finish. These bold colors are not just about aesthetics; they’re about expressing individuality and embracing a confident, contemporary style.
Embracing Natural Textures: Air Drying & Styling
A significant shift in hair philosophy for 2024-2025 is the celebration of natural texture. Move away from excessive heat styling and embrace the beauty of your hair’s inherent waves, curls, and coils! This trend prioritizes hair health and effortless style, encouraging techniques that enhance, rather than alter, your natural pattern.
Air drying is a cornerstone of this movement, allowing hair to dry without heat damage. Utilizing curl-enhancing products like creams, gels, or mousses can define and amplify your natural texture. For those seeking a bit more polish, minimal styling with diffusers or gentle braiding while damp can create beautiful, defined results.
The focus is on working with your hair, not against it. This means choosing products formulated for your specific texture and learning techniques that minimize manipulation. Embrace the ease and freedom of letting your natural beauty shine through, resulting in healthier, happier hair!
Retro-Inspired Cuts: 90s Blowouts & Choppy Bobs
The past is proving to be a major source of inspiration for 2024-2025 hairstyles, with the 1990s taking center stage. Two key looks dominating the trend are the voluminous 90s blowout and the edgy, choppy bob. These styles offer a blend of nostalgia and modern flair, providing versatile options for various hair types and lengths.
The 90s blowout is all about volume and bounce. Achieved with a round brush and hairdryer, this style creates a full, glamorous look reminiscent of iconic supermodels. Root lift and carefully directed airflow are essential for achieving maximum volume.
Conversely, the choppy bob offers a more textured and rebellious vibe. Featuring deliberately uneven layers, this cut adds movement and dimension. It’s a fantastic choice for those seeking a low-maintenance yet stylish look. Both styles represent a playful nod to the past, reimagined for the modern woman.
The Grown-Out Shag: Effortless & Edgy
Embrace a relaxed yet undeniably cool aesthetic with the grown-out shag, a hairstyle rapidly gaining popularity for 2024-2025. This isn’t about perfectly polished perfection; it’s about embracing a deliberately undone, effortlessly chic vibe. The grown-out shag is characterized by its layers, texture, and a slightly wild, free-spirited feel.
Unlike a traditional shag requiring frequent trims, the grown-out version allows for more flexibility and a lower-maintenance routine. Layers are allowed to blend and soften over time, creating a natural, lived-in look. This style works beautifully with natural waves and curls, enhancing their texture and movement.
Styling is minimal: a texturizing spray or mousse can enhance the layers, while air-drying is often encouraged. The grown-out shag is perfect for those seeking an edgy, low-effort style that exudes confidence and individuality. It’s a testament to the beauty of imperfection.
Sandy Brunette: A Popular Color Choice
Sandy brunette is emerging as the must-have hair color for 2024-2025, captivating stylists and hair enthusiasts alike. This shade isn’t a single tone, but rather a beautiful blend of warm and cool undertones, mimicking the hues of a sandy beach. It’s a sophisticated alternative to both traditional brunette and blonde, offering a universally flattering appeal.
What sets sandy brunette apart is its versatility. It features a base of rich brunette infused with subtle golden and beige highlights, creating dimension and luminosity. This color works exceptionally well with various skin tones, adding warmth and brightness without appearing overly harsh.
Achieving the perfect sandy brunette often requires a skilled colorist to balance the tones effectively. Maintenance involves using color-safe products and occasional gloss treatments to refresh the highlights and prevent fading. It’s a low-commitment color that delivers high impact, embodying effortless chic.
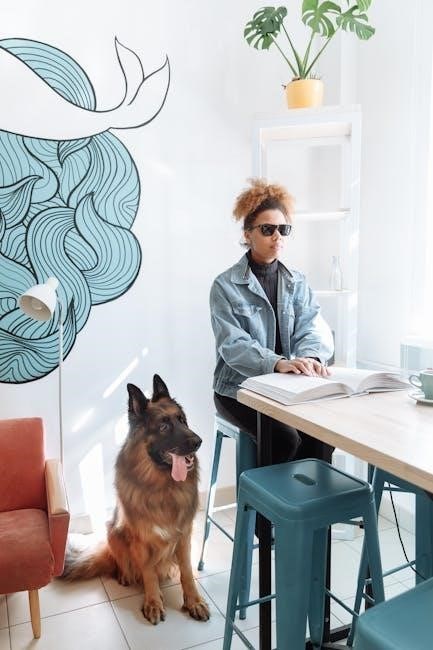
Slicked-Back Styles: Buns & Ponytails
Slicked-back hairstyles are dominating the trend scene for 2024-2025, offering a polished and sophisticated look with minimal effort. This style isn’t limited to one specific iteration; it beautifully translates into both sleek buns and elegant ponytails, making it incredibly versatile.
The key to achieving the perfect slicked-back finish lies in product choice. A strong-hold gel or pomade is essential for smoothing down flyaways and creating a clean, defined hairline. Whether opting for a high ponytail or a chic bun, ensure all strands are neatly tucked and secured.
This trend is particularly appealing for its ability to showcase facial features. The pulled-back style accentuates cheekbones and jawlines, creating a striking and modern aesthetic. It’s a go-to choice for both everyday wear and special occasions, effortlessly elevating any outfit. Embrace the sleekness and simplicity of slicked-back styles!
Single Braided Ponytails: Simplicity & Style
Embrace effortless chic with the rising trend of single braided ponytails for 2024-2025! This hairstyle perfectly embodies the “easy and breezy” aesthetic that’s defining fall hair trends. It’s a refreshing departure from more complex styles, offering a sophisticated yet relaxed vibe.
The beauty of this look lies in its simplicity. A classic three-strand braid incorporated into a ponytail creates a visually appealing texture and adds a touch of personality. It’s incredibly versatile, suitable for various hair lengths and textures, and can be adapted for both casual and more formal settings.
To enhance the style, consider adding subtle accessories like delicate hair ties or ribbons. This simple addition can elevate the look and showcase your individual style. Single braided ponytails are a fantastic option for those seeking a low-maintenance yet stylish hairstyle that’s both on-trend and timeless.
French Girl Bob: A Timeless Classic
The French Girl Bob continues its reign as a perennial favorite, remaining a key hairstyle trend for 2024 and extending into 2025. This isn’t just a fleeting fad; it’s a sophisticated, effortlessly chic look that embodies understated elegance and timeless appeal.

Characterized by its slightly undone texture and face-framing layers, the French Girl Bob exudes a natural, “I woke up like this” vibe. It typically falls between the chin and collarbone, offering versatility in styling. The key is to avoid overly polished or structured looks, opting instead for a relaxed, lived-in feel.
This style is incredibly flattering on a wide range of face shapes and hair types. It’s a low-maintenance option that requires minimal styling, making it perfect for those seeking a chic and practical everyday look. Embrace the effortless beauty of the French Girl Bob and experience a touch of Parisian sophistication!
Daring Cuts: Exploring Asymmetry & Unique Shapes
For those seeking a bold statement, 2024-2025 encourages experimentation with daring cuts that move beyond conventional styles. Asymmetry and unconventional shapes are taking center stage, offering a refreshing departure from traditional haircuts.

Think uneven lengths, sharp angles, and unexpected geometric designs. These cuts are all about expressing individuality and embracing a fearless approach to hair. Asymmetrical bobs, with one side significantly longer than the other, are particularly popular, as are cuts featuring disconnected layers and bold, sculpted shapes.
This trend isn’t for the faint of heart, but it’s a fantastic way to showcase personality and make a lasting impression. Successful execution relies on skilled precision cutting, so consulting with an experienced stylist is crucial. Don’t be afraid to push boundaries and explore the artistic possibilities of your hair!
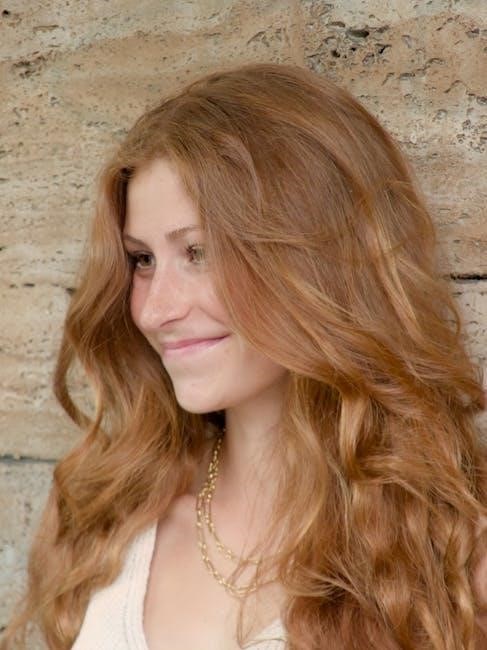
Golden Hair Tones: Bright & Radiant Colors
As we move through 2024 and into 2025, golden hair tones continue to reign supreme, offering warmth and luminosity to any hairstyle. However, the trend is evolving beyond simple blonde shades, embracing a spectrum of bright and radiant colors that capture the light beautifully.
Expect to see variations like honey blonde, butterscotch, and champagne hues gaining popularity. These shades add dimension and vibrancy, complementing a wide range of skin tones. The key is to achieve a multi-tonal effect, incorporating subtle highlights and lowlights to create depth and movement.
For those wanting a bolder look, consider incorporating golden pieces into darker bases, such as caramel highlights in brunette hair. Maintaining the vibrancy of golden tones requires specialized care, including color-safe shampoos and regular conditioning treatments. Embrace the sunshine and let your hair shine!
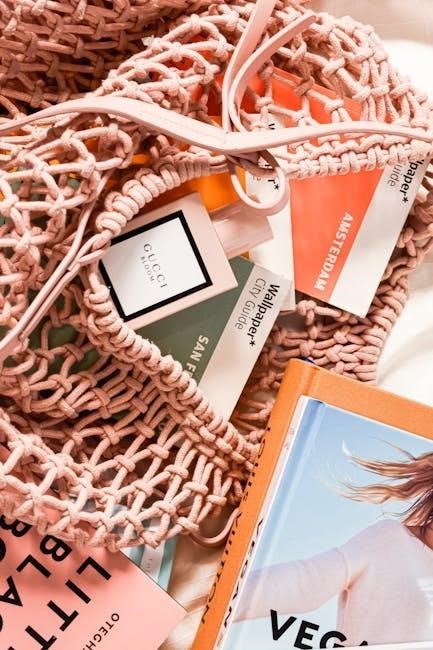
Sustainable Haircare Practices: Healthy Hair Habits
Beyond the latest trends, a growing focus on sustainable haircare is shaping the industry in 2024 and 2025. Healthy hair starts with mindful practices that minimize environmental impact and prioritize long-term well-being.
This includes opting for products with natural, ethically sourced ingredients and reducing the use of harsh chemicals like sulfates and parabens. Consider waterless shampoos and conditioners to conserve water, and embrace reusable hair accessories to minimize plastic waste.
Regular scalp massages promote circulation and hair growth, while minimizing heat styling reduces damage. Air drying is a fantastic option whenever possible, and protective styles can help retain length and prevent breakage. Prioritizing a healthy diet rich in vitamins and minerals also contributes to strong, vibrant hair. Embrace a holistic approach to haircare that benefits both you and the planet!
Hairstyle Maintenance & Longevity
Achieving and maintaining your desired hairstyle requires consistent effort and the right techniques. Regular trims are crucial for removing split ends and preserving the shape of your cut, typically every 6-8 weeks.
Investing in quality haircare products tailored to your hair type is essential. Deep conditioning treatments provide hydration and repair damage, while leave-in conditioners offer ongoing protection. Protecting your hair from heat styling is paramount; always use a heat protectant spray before using tools like blow dryers, straighteners, or curling irons.
Nighttime routines can significantly impact hair health. Consider using a silk or satin pillowcase to reduce friction and breakage. Proper brushing techniques, using a wide-tooth comb, prevent unnecessary damage. Finally, remember that a healthy lifestyle, including a balanced diet and adequate hydration, contributes to overall hair strength and longevity.

Finding the Right Hairstyle for Your Face Shape
Selecting a hairstyle that complements your face shape is key to achieving a flattering look. Understanding your face shape – whether it’s oval, round, square, heart, or oblong – is the first step.
Oval faces are versatile and can pull off most styles. Round faces benefit from styles that add height and length, avoiding blunt cuts. Square faces soften with layers and styles that frame the jawline. Heart-shaped faces balance with styles that add width at the chin, like bobs or layers.
Oblong faces look best with styles that add width, such as layers or curls. Consider your hair texture and lifestyle when making your decision. Don’t be afraid to experiment! Consulting with a professional stylist can provide personalized recommendations and ensure your chosen hairstyle enhances your natural features and boosts your confidence.